What to Consider

What to Consider Before Finishing an Attic or Basement
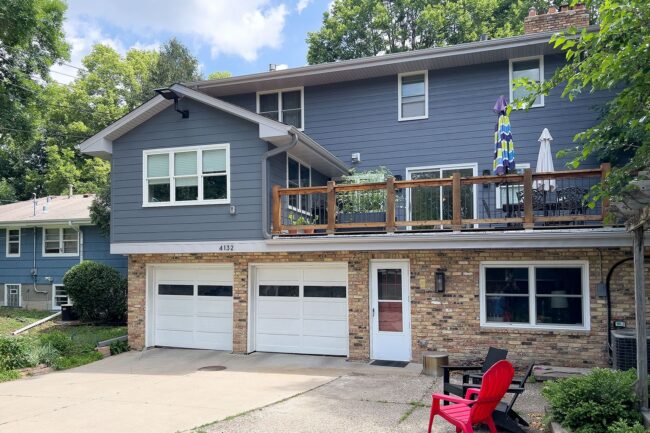
Finishing your attic or basement is a fantastic way to unlock your home’s full potential. This project can transform unused or underutilized spaces into vibrant living areas, offices or entertainment rooms.


It provides more space to enjoy and significantly increases your property’s value. Investing in these renovations enhances your daily living experiences and is a wise financial decision that can pay off in the long run. With careful planning and design, your attic or basement can become one of the most beloved parts of your home.

1.   Understanding Local Building Codes and Permits

Being aware of local regulations is crucial when finishing your attic or basement. Building codes ensure safety, accessibility and structural integrity. For example, rooms with sloped ceilings — like attics — have specific requirements. The ceiling must be 5 feet high, and 50% of the floor area must have a height of at least 7 feet.


These rules ensure the space is livable and comfortable. Contacting local building authorities early on is essential to navigate these regulations successfully and avoid potential setbacks. They can provide you with the necessary permit requirements and guidelines. This step ensures your project complies with all local codes, smoothing the renovation process and helping avoid costly mistakes.

2.   Assessing Structural Integrity

Checking the structural soundness of your attic or basement before starting work is vital. This ensures your space can safely support the planned renovation. The foundation and framing are especially crucial, as they bear your home’s weight.


Consulting with a professional — like a structural engineer — can provide an expert evaluation of these elements. They can assess whether the existing structures are robust enough or if reinforcements are needed.


This evaluation guarantees safety and prevents future problems from overloading an unsuitable structure. This proactive step ensures the longevity and safety of your renovation project, protecting your investment and household members.

3.   Planning for Insulation and Ventilation

Proper insulation maintains temperature control in your attic or basement, ensuring the space is comfortable and energy-efficient throughout the year. Before insulating, it’s essential to check for water seepage by taping a plastic sheet to the wall with duct tape and waiting for 48 hours — if condensation forms, you have moisture issues that need addressing.


Additionally, adequate ventilation prevents moisture buildup, which can lead to mold and mildew, posing health risks and structural damage. You create a safe, healthy and enjoyable living space by prioritizing insulation and ventilation.

4.   Maximizing Natural Light and Windows

Incorporating natural light into your attic or basement can dramatically transform the space. Consider adding windows or enlarging existing ones to invite more sunlight in. Skylights are a fantastic option for attics, as they can flood the area with sunshine without compromising privacy or wall space. Consider installing egress windows for basements, which can also serve as safety exits.


These changes enhance the ambiance, making the space feel more open and welcoming and improving energy efficiency. Natural light reduces the need for artificial lighting during the day, cutting down on electricity bills.

5.   Considering Electrical and Plumbing Requirements

Assessing the need for additional electrical outlets and plumbing ensures they meet the intended use of the space. Basements are more prone to flooding and water damage, so careful consideration must be given to plumbing to avoid future problems.


Hiring licensed professionals for electrical and plumbing work is essential, as they bring expertise in local codes, safety and efficiency to your project. These experts can also provide valuable insights on preventing water damage — like the installation of sump pumps or backwater valves — securing the functionality and safety of your renovation.

6.   Choosing the Right Flooring

Choose materials that can withstand moisture and heavy use when selecting flooring for attics and basements. Options like vinyl plank, ceramic tile or specially designed cellar floor tiles are ideal due to their water resistance and durability. These materials can handle the damp conditions often found in basements and are easy to clean and maintain.


Engineered hardwood or laminate flooring can offer durability and a warm aesthetic in attics, where moisture may be less of a concern but temperature fluctuations are common. Engineered hardwood, in particular, is less susceptible to warping from temperature changes than traditional hardwood.

7.   Addressing Safety and Accessibility

It’s essential to prioritize safety by including smoke and carbon monoxide detectors in your plan. These devices are crucial for detecting fires and gas leaks early, potentially saving lives.


Consider incorporating a secondary exit to provide a safe emergency escape route. It is imperative in small, confined spaces, which accounted for 71% of residential building fires from 2017 to 2019. Such statistics highlight the critical need for adequate safety measures in these spaces.

8.   Designing for Functionality

Take a moment to envision how you’ll use the space. It can be a home office where quiet and privacy are key. It may also be a gym with your favorite workout machines and ample floor space for exercise. Another option is an extra bedroom, providing a cozy retreat for guests or a new family member.


Each purpose demands different considerations in terms of layout, lighting and ventilation. Imagining your daily activities in this new space helps you tailor the design to fit your needs perfectly. Think creatively and plan strategically to transform your attic or basement into a functional and enjoyable home extension.

9.   Budgeting Wisely

Creating a realistic budget is crucial for completing your attic or basement project. It’s imperative to account for all potential costs, which can range from $50 to $150 per square foot for an attic renovation.


Remember to include a contingency fund for unexpected expenses, ensuring you’re ready for surprises. This proactive financial planning helps avoid stress and keeps your project on track, allowing you to focus on transforming your space.

10.        The Value of Professional Help

Consulting with architects, designers and contractors brings invaluable benefits to your attic or basement renovation. These professionals possess the expertise to foresee potential challenges, suggest innovative solutions and ensure your project complies with local building codes.


Their guidance can streamline the renovation process, preventing costly mistakes and saving you time and money in the long run. Leveraging their skills and knowledge lets you achieve a high-quality finish that enhances your home’s value and functionality, making professional consultation a wise investment for any renovation project.

Planning for Success in Attic and Basement Transformations

Planning and considering all aspects carefully before diving into your attic or basement renovation is crucial. Each step — from ensuring structural integrity to consulting with professionals — is vital to the project’s success. Thoughtfully addressing these elements provides a smooth and successful transformation, turning your vision into a reality

Renovations Can Impact Your Home Insurance

How Getting Renovations Can Impact Your Home Insurance

Home renovations can freshen up an otherwise drab dwelling and increase the value of your house. Unfortunately, you might also run into unexpected expenses such as needing more insurance to cover a higher replacement value and added protections while people work on the space.


Some improvements naturally increase expenses, such as adding a pool or other luxury items. If your home still falls under prime mortgage insurance (PMI), an increase in property taxes that are umbrellaed into payments may result in higher overall costs as well.


Experts predict homeowners will spend around $621 billion in total home improvements in 2025. They may not realize the added costs of insurance, though. Going in with your eyes open prepares you for added expenses and allows you to plan. Here are the things you should consider before undertaking a new project.

1. New and Upgraded Materials

Whether you want to upgrade your countertops from Formica to granite or you’re getting a building up to code, replacing dated materials with higher end ones can up the replacement costs and thus the amount of insurance coverage you need.


Review your policy with your insurance agent to ensure you have adequate coverage should the worst happen. Those living in Florida and leasing may be subject to Senate Bill 4-D and need to add hurricane impact windows and doors. Associations must now keep records of structural conditions and maintenance work to share with unit owners and buyers.


However, insurance companies are also offering a discount on premiums of as much as 45% with proper maintenance and materials. Each location can be unique so seeking someone with knowledge of the area makes the most sense. Getting an independent adjuster should you have a claim can also increase the amount received in case of a claim.

2. Higher Home Value

If you build an addition and increase your home’s square footage, you’ll need added coverage should anything happen. The old insurance plan likely isn’t for enough funds to replace your new structure should you lose everything in a fire or natural disaster.


Also consider any additional personal items added space brings. One example is building an in-law suite to accommodate your aging parents. You’ll need added coverage to accommodate their belongings as well as enough to replace the building should it be irreparably damaged.


Take inventory and photos of everything, including the renovated areas and keep them on file in another location in case of emergency.

3. Safety Features and Bonus Items

Adding some safety features can reduce your insurance premiums. For example, if you live in a high crime area, adding bars to the windows or an in-home security system might net you a discount.


Working smoke alarms can bring an additional discount. Some insurance companies offer discounts for adding a new roof or sprinklers or upgrading wiring and plumbing.


Interior sprinkler systems can reduce damage caused by a fire and may bring perks such as lower premiums. Talk to your agent about other discounts, such as multiple policy perks when you have your automobiles and homeowners with the same company.

4. Construction Coverage

Good idea to add additional coverage for the liability of having workers with heavy equipment or climbing on ladders and such. Even the added number of deliveries could result in an injury and claim against your property.


DIYers may want to take out some builders’ risk insurance should something happen while a new room or section of your home is under construction. Potential damage could come from vandals, natural disasters or thieves.


Talk to your contractor about the coverage they have on their crew and equipment. Some states require they take out certain policies before working a job site.

5. Home Office Coverage

If you’re building a home office, you might find you need additional coverage. Depending upon the type of business you’re running, you may have to cover expensive equipment or take out added insurance to cover clients coming and going from your space.


Talk to your insurance provider about whether you can tag on an umbrella policy with extended coverage or if you need a separate business policy. Some companies offer in-home business insurance, which may be less than other policies.

6. Flood Insurance

If you don’t currently have flood insurance, you may not realize how pricey it can be. However, if you add a basement or otherwise change the landscape or structure of your home, you could create a scenario where you now need flood insurance.


The Insurance Information Institute reports that flood damage is excluded under standard policies. Homeowners can secure a separate policy through the National Flood Insurance Program via FEMA or private companies. Only 78% of people at risk of a flood secured some form of insurance in 2023. Flood insurance can add considerably to the overall cost of coverage.


Talk to your insurance agent before beginning basement construction to find out the requirements for your area. Where is the water table and can you build on with a basement or will you now be required to add expensive coverage to your policy you didn’t need before?

7. Check Contractor’s Insurance

Don’t just talk to your contractor about their insurance. Get written confirmation they are bonded and insured. The last thing you want is for someone on their crew to get harmed and you be responsible for all their medical expenses.


Another nightmare scenario involves a contractor who doesn’t know what they’re doing, damages your existing house and leaves the structure half-finished. Insurance is meant to protect homeowners from unscrupulous builders.

8. Transportation Concerns

If you’re transporting any of the building materials yourself, ensure your automobile insurance will cover any problems. Things such as bundles of wood or heavy tiles may come loose and create damage while driving down the road.


Typically, your auto insurance would cover you for any liability but it’s always best to double-check and make sure you have adequate amounts should the unthinkable happen.

9. Lapse in Coverage

You should always inform your insurance company of any upcoming renovations. Many policies have fine print that states you must tell them within so many days before starting construction to be covered. While the policy typically will cover damages during construction, such as a building collapsing, it’s best to cover your bases and make sure your agent is aware of your building plans and that you take out any additional recommended extensions to your policy.


Keep in mind if you must vacate your home during some of the renovations, your standard policy also won’t cover you for theft and vandalism as the property will be considered vacant. Talk to your agent about any needed coverage to protect your assets from bad players while you aren’t there.

Review Policy and Upgrade After Finishing Renovations

You should work with your provider and review your policies at several points during the renovation process. Talk to your agent before starting remodeling, during and after completion to ensure you have the insurance you need at a rate you can afford.


Once you’ve finished your upgrades, get an independent evaluation of replacement costs and ensure you have adequate coverage for your home’s current, updated value rather than what it was worth before the renovations began.

The Benefits of Solar Energy

The Benefits of Solar Energy in Home Remodeling

Have you ever thought about how the sun can play a major role in your home’s makeover? Yes, we’re talking about harnessing the power of those golden rays to brighten up your property, not just with light but with energy—solar energy, to be precise. With the buzz around sustainable living getting louder, integrating solar energy into home remodeling is not just a trend. More than that, it’s a smart, forward-thinking move. The benefits of solar energy stretch far beyond saving a few bucks on your electricity bill; they touch upon everything from boosting your home’s value to contributing to a healthier planet. So, let’s explore why going solar is the ultimate upgrade for your home renovation project.

Solar Energy 101 for Home Renovators

Solar energy and home remodeling are like peanut butter and jelly—a perfect match. But before we get into the nitty-gritty, let’s break down what solar energy is all about. At its core, solar energy captures the sun’s power and converts it into electricity for your home.

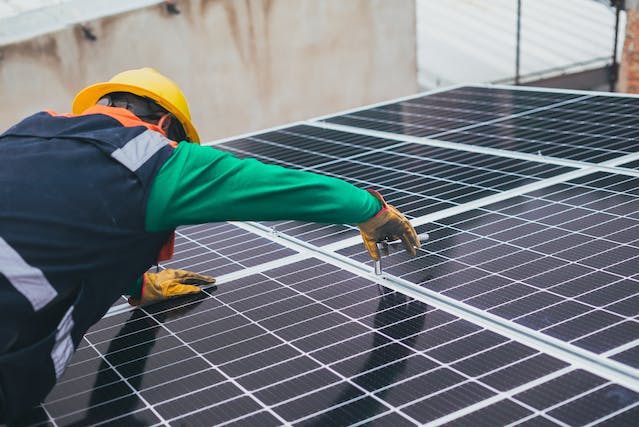
 Solar energy transforms sunlight into electricity, with solar panels being a common tool for capturing this clean, abundant resource.


Whether through photovoltaic (solar) panels, solar water heaters, or even chic solar street lights, incorporating solar into your home cuts down on electricity costs and ups your green game. It’s all about making your home a sustainable sanctuary.

Why Your Wallet Loves Solar Energy

Now, let’s talk money because, let’s face it, remodeling isn’t cheap. The upfront cost of solar panels might make you pause but think of it as the gift that keeps on giving. Over time, the savings on your energy bills can be substantial. In fact, you’ll generate free electricity a couple of years after your initial investment.

Plus, with various federal and state incentives, the initial cost isn’t as scary as it seems. And here’s a fun fact: homes with solar energy systems often enjoy a higher resale value. Who knew being eco-friendly could also be wallet-friendly?

Mother Nature’s Best Friend

Switching to solar isn’t just good for your pocket; it’s a big high-five to the environment. By reducing your reliance on fossil fuels, you’re cutting down on greenhouse gas emissions and contributing to cleaner air and a healthier planet. It’s a win-win: you get to enjoy the comforts of modern living while also knowing you’re doing your bit for the earth. And in today’s world, being part of the green movement is more important than ever.

The Bright Future of Solar in Home Remodeling

The future looks sunny for solar energy in home remodeling. With technological advancements, solar solutions are becoming more affordable, efficient, and stylish. Even home remodeling pros increasingly incorporate solar solutions into their projects, showcasing how sustainability and style can go hand in hand.

The future of solar energy is bright, promising innovative solutions for sustainable living and energy independence.

We’re seeing a trend towards not just solar panels but complete solar energy systems being integrated into the design and construction of new homes. This movement towards sustainability is not just a fad; it’s the future of home design. As we move forward, solar energy will play an even more significant role in how we think about, design, and live in our homes.

Getting Solar-Ready: Tips and Tricks

Embracing solar energy in your home remodeling is about making a savvy investment in your home’s future and tapping into the vast benefits of solar energy. Of course, its eco-friendly aspect is only that much more appealing.

Here’s how you can ensure your home is primed for this eco-friendly upgrade:

  • Evaluate your home’s solar potential. Not every home is situated to take full advantage of solar power. Consider factors like your roof’s direction, any shade from trees or buildings, and your local climate. Sites like Google’s Project Sunroof can provide a quick assessment.
  • The condition and lifespan of your roof are crucial, so make sure to inspect and check your roof’s readiness. Installing solar panels on a roof that needs repairs or will need replacing soon is like putting new wine in old bottles. Ensure your roof is in tip-top shape to avoid double handling.
  • Understand your energy needs by analyzing your current electricity usage. This insight will help you determine the size and type of solar system best fits your requirements.
  • Many areas offer incentives, rebates, or tax breaks for solar energy installations, so make sure to explore them.
  • If upfront costs are a concern, look into solar financing options. Leases, loans, and Power Purchase Agreements (PPAs) can make solar energy accessible without a hefty initial investment.
  • From traditional photovoltaic (PV) panels to solar thermal systems for hot water and even solar tiles that blend seamlessly with your roofing material, the right technology can enhance your home’s efficiency and aesthetics.
  • Integrating solar energy into your home is also about adopting a holistic approach to green remodeling. Consider other eco-friendly updates like energy-efficient windows, LED lighting, and proper insulation to maximize your home’s energy efficiency.
  • Finally, the importance of working with experienced professionals cannot be overstated. From assessing your home’s solar potential to installation and maintenance, choosing a reputable and knowledgeable team ensures your solar project’s success.

With these tips in mind, you’re well on your way to preparing your home for a solar makeover.

The Bigger Picture

When it comes to remodeling, we all want our homes to look fabulous, right? Solar energy systems are no longer big, bulky panels on your roof. Today, they can be a seamless part of your home’s design. Imagine solar panels that blend perfectly with your roofing tiles or innovative residential solar street lights that add charm to your garden paths while providing eco-friendly illumination.

Adding energy-efficient features enhances the benefits of solar energy, making your home even greener and cost-effective.

Beyond functional, these are statement pieces saying, “I care about the environment, and my home looks stunning while doing it.” Thus, you could even talk with your neighbors and opt for solar street lights together, as they combine aesthetic appeal with practical, sustainable solutions. Also, their compatibility with home automation systems lets you control outdoor lighting remotely. This includes setting the brightness level and the time when you wish for them to go on and/or off.

Reap The Benefits of Solar Energy by Powering Up Your Home Remodel

In conclusion, the benefits of solar energy in home remodeling are too good to ignore. So, consider solar energy if you’re pondering how to give your home that extra edge. Not only will it brighten up your space in the literal sense, but it’ll also contribute to a greener, more sustainable future.

Ready to take the next step? Don’t hesitate to reach out to an experienced remodeling team that can guide you through the process, ensuring your home remodel shines brighter than ever. Your solar-powered home remodel can be a beacon of efficiency, style, and sustainability with the right approach.


Make Your Home More Energy Efficient

9 Steps to Take in Order to Make Your Home More Energy Efficient

Energy efficiency is on everyone’s minds as climate change and electricity bills increase. Fortunately, improving your energy consumption at home takes little effort and always results in impressive cost savings.


If you want to save money and reduce your environmental footprint, these nine energy-saving steps can help you achieve optimal efficiency with less power.

1.  Conduct an Energy Audit

You have two options for a residential energy audit: Hire a professional or do it yourself. The benefit of conducting an energy audit yourself is you can learn more about your home’s energy inefficiencies using everyday tools free of charge.


Conversely, a professional energy auditor will provide a more comprehensive and accurate assessment of your current energy consumption with actionable recommendations. Although professional home energy audits are costly at about $100-$2,000, the experts have a much better grasp of hidden inefficiencies you might be unaware of.

2.  Switch to LED Light Bulbs

Considering 15% of your home’s electricity consumption comes from lighting, swapping out incandescent light bulbs for light-emitting diodes (LEDs) can save you a lot of money.


LEDs expend 90% less energy, with $225 in annual savings on electricity bills. Energy isn’t the only place you save with LEDs, though — because they last 25 times longer than conventional bulbs, you’ll buy far fewer replacements.


Incandescent light bulbs last about 1,200 hours over their lifetime, meaning they usually need replacing every 1.64 years if you use them for two hours daily. LEDs work for 25,000 hours, requiring a replacement every 34.25 years. Do the math: You could spend $1,000 on incandescent bulbs over an LED’s life span.

3.  Reinsulate

If your home hasn’t been reinsulated for some time, you could miss out on energy efficiency and cost savings. Insulation is a barrier to heat flow, locking it in, lowering your heating and cooling expenses, and improving indoor comfort.


It is best to insulate everything in your home, from the walls to the ceilings and the floors. Even the garage door can be insulated. Proper insulation is measured by R-value — the material’s thermal resistance. Save 10% on heating and cooling costs annually with the right amount of R-value insulation.

4.  Seal Air Leaks

While insulating your home, identify air leaks from windows, doors, crawl spaces, attics, basements, vents, outlets and baseboards. Often, you can find an air leak by sensing a cool draft.


A technician can do a blow test to determine where air leaks are occurring and the severity. If you choose not to hire someone, conduct a less-detailed blow test yourself.


Turn off combustion appliances when the weather turns cold and windy. Ensure all the windows, doors, and fireplace flues are closed. Then, turn on all the exhaust fans in your home and light an incense stick near potentially drafty areas. If the smoke gets sucked out or blown away, there is an opening in need of weatherstripping.

5.  Install a Smart Thermostat

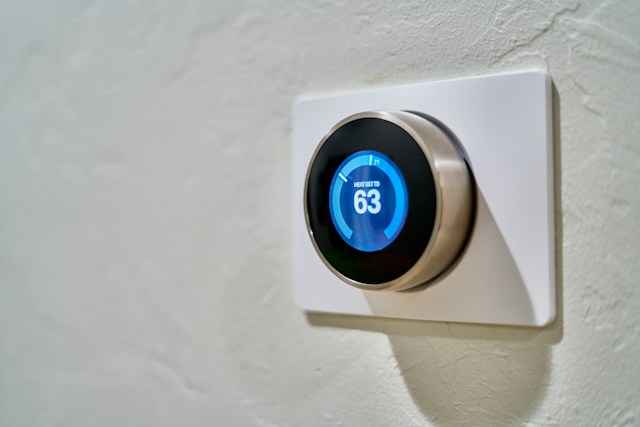
A smart thermostat is a Wi-Fi operating system capable of controlling heating and cooling for optimal indoor comfort. The benefits of using smart thermostats are as follows:


  • Allows you to manage your home’s temperature remotely using your smartphone
  • Learns your preferred temperature and schedule to adjust your settings automatically
  • Uses geofencing to detect when you are on your way home, so it automatically adjusts
  • Enable low-power standby mode when there is little activity
  • Tracks energy use and monitors indoor humidity
  • Uses sensors to detect room occupancy and adjusts the temperature accordingly


Save 8% on heating and cooling bills with an ENERGY STAR-certified smart thermostat, amounting to $50 annually.

6.  Replace Appliances With Efficient Models

Unquestionably, you couldn’t live without your microwave or refrigerator. When older appliances start breaking down, replacing them becomes your top priority.


Nowadays, efficient models of everyday home electronics — stove tops, ovens, washing machines, dishwashers and more — must meet the most current federal energy standards. While initial investments tend to be expensive, newer models reduce your carbon footprint and help you save money long-term.


You can always count on the U.S. Department of Energy’s ENERGY STAR appliances to do the job correctly with less power consumption. Just be sure to dispose of the older ones correctly — many stores will recycle old appliances for you when they drop off your new models.

7.  Invest in Water-Saving Fixtures

In addition to upgrading appliances, you can improve your home’s energy efficiency by installing water-saving fixtures, including faucets, showerheads and toilets.


Toilets account for 30% of residential water usage, with many conventional models using six gallons of water per flush. However, new WaterSense-labeled models only use 1.28 gallons per flush — still 20%-60% less than federal regulations.


Investing in water-conserving toilets saves up to 13,000 gallons annually, amounting to $140 in yearly water bills and $2,900 throughout the product’s life span.

8.  Use Smart Plugs

You may not realize it, but your television and other electronic devices consume a ton of energy just by being plugged in. Phantom devices can add $100-$200 to your annual electricity bills — a 10% increase in total energy use.


Like other smart devices, smart plugs are Wi-Fi-enabled and controlled through a smartphone or tablet app. You can also integrate your smart plug with a voice assistant like Google Home or Amazon Echo.


Smartphone control especially comes in handy when you’ve left devices plugged in by accident while traveling. One button can turn off home electronics remotely and save you money.

9.  Install Solar Panels

Solar panels have become more popular in recent years, especially with 2022’s Inflation Reduction Act extending tax credits on residential renewable energy projects.


Although solar panel systems are an expensive investment — even with incentives and rebates — homeowners usually save $42,000 over their 25-30-year lifetime, depending on your state’s electricity rates.


Of course, while solar panels still absorb energy in a rainy, cold or cloudy region, they work best where there is the most sun throughout the year.

Live Comfortably in an Energy-Efficient Home

An energy-efficient home enhances your comfort and helps ease the financial burden of rising utility costs. Even minor changes make a significant difference. Take a step-by-step approach to improving at-home energy use and reap immediate rewards.


Better Your Home’s Air Quality

How to Better Your Home’s Air Quality in 2024

Often, you’ll hear about poor air quality on the news — Beijing may be covered in smog while Canadian wildfires send billowing smoke down the east coast of the United States. But if you thought locking yourself indoors offered the best protection against outdoor air pollution, think again — indoor air is just as bad for you, perhaps even worse. Fortunately, you have greater control over it than you do outside.


Enhancing your house’s air quality should be your top priority this year. By filtering out pollutants, you can improve your health and comfort. Here’s everything you should know about indoor air and tips for creating a clean, breathable space.

What Causes Poor Indoor Air Quality?

According to the U.S. Environmental Protection Agency, the average American is inside 90% of the time, making indoor air quality of the utmost importance. There are numerous sources of air pollution in your home — some unexpected — like the following:


  • Household cleaning and personal care products
  • Humidity and moisture
  • Paint, sealants, air fresheners and other products with volatile organic compounds (VOCs)
  • Building materials — new flooring, carpet, upholstery, cabinetry and insulation with asbestos
  • Fuel-burning appliances
  • Central heating and cooling systems
  • Cigarette smoke


Of course, outdoor sources around your property — radon, pesticides and ozone — can also get inside when you open doors and windows, or have cracks in your house. Ultimately, your air quality health depends on how old and hazardous emissions sources are. Indoor pollutants will remain for some time, though.

7 Tips to Improve Your Home’s Air Quality

Improving your home’s indoor air quality in 2024 doesn’t have to be a challenging endeavor. A few adjustments can make a significant difference. Here are seven easy ways to make your air quality healthier.

1.    Change Air Filters

When was the last time you changed your air filters? They’re hard at work, preventing dust, pollen, mold, pet fur, bacteria and dirt from circulating throughout your home. In fact, high-efficiency particulate air filters capture air pollutants under 0.3 microns, making them among the most effective on the market.


Experts recommend changing your air filters every three to 12 months, depending on their thickness, how often you run your heating and cooling systems, and where you live. Those living in very hot or cold climates will run their HVAC unit often, requiring them to change their filters more often.

2.    Clean the House

Look under your bed — if you’ve forgotten to vacuum out the dust bunnies for some time, you’ll be in for a surprise. Dust accumulates everywhere, including window blinds, on shelves and dressers, air vent covers, in the back of your closet, and behind the stove and refrigerator.


Yet, according to the American Lung Association, some generations are worse at prioritizing dusting than others. For instance, 66% of Gen Z and 73% of Baby Boomers avoid dusting their homes, while 38% of millennials and 63% of Gen X do the same. Deep cleaning your house to remove unwanted dust, dirt, and dander is better for your respiratory health and overall well-being.

3.    Avoid Scented Items

Indoor VOCs are two to 1,000 times higher than outdoor levels. Without realizing how prevalent they are in your home — many are odorless — you may experience more frequent headaches, migraines, fatigue and allergies.


Other VOC-emitting products are scented, though. Candles, air fresheners, essential oils and perfume are items you may want to rid your home of. Many cleaning supplies, paints and sealants also contain VOCs. Always check product labels to ensure they don’t have VOC ingredients like ethylene glycol, formaldehyde and benzene.

4.    Ventilate

Opening the windows may seem counterintuitive if you’re trying to rid your house of air contaminants. However, under the right conditions, ventilation helps improve indoor air. Of course, those with allergies or asthma should check outdoor air quality before opening up their home.


Allowing fresh air in can kill viruses and prevent the spread of diseases, including COVID-19. If it’s beautiful spring weather or a brisk fall day, open your windows or leave them cracked, then turn the ceiling fans on to push the indoor air out. You should do the same for doors with screens.

5.    Use Your Range Hood

Research shows natural gas stoves emit harmful methane gases into your home even when shut off. For perspective, if you combined the yearly methane emissions from every gas stove in U.S. homes, it would amount to emissions from 500,000 cars annually.


Particulate matter is especially harmful during cooking. Always use your range hood when preparing food using a gas or electric stovetop. Just five minutes of cooking can emit 36 milligrams per cubic meter of air in single-family homes.

6.    Purify With Plants

Plant parents rejoice — some houseplants are effective air purifiers you can fill your home with, such as spider plants, peace lilies, Boston ferns, echeveria succulents, pothos, lady palms and monstera deliciosa.

Studies have even shown the purifying effects of Boston ferns and peace lilies on formaldehyde. You may not realize how prevalent formaldehyde sources are in your home — gas appliances, electronics, rubber, lubricants, adhesives, plywood and MDF, water-based paints, and makeup. Yet inhaling this VOC can cause severe respiratory conditions, gastrointestinal disorders and cancer.

7.    Maintain Proper Indoor Humidity

When your home’s indoor humidity levels are too high, it could create the perfect conditions for mold and mildew. They can cause severe respiratory symptoms, such as wheezing, difficulty breathing, coughing, sneezing, headache and fatigue. Meanwhile, dry air could lead to skin, throat and eye irritation.


Ideally, indoor humidity should be 30%–50%, which you can measure with a simple moisture gauge from your local hardware store. If your indoor humidity is too low, purchase a vaporizer or humidifier. Opening windows can also lower humidity as long as outdoor temperatures aren’t too warm and air moisture content is low.

Rid Your Home of Air Pollutants Today

Air contaminants hide in the most unexpected places — but removing the sources and tweaking your lifestyle habits can improve indoor air quality and your household’s health. Take this year to breathe easier in the comforts of your home.