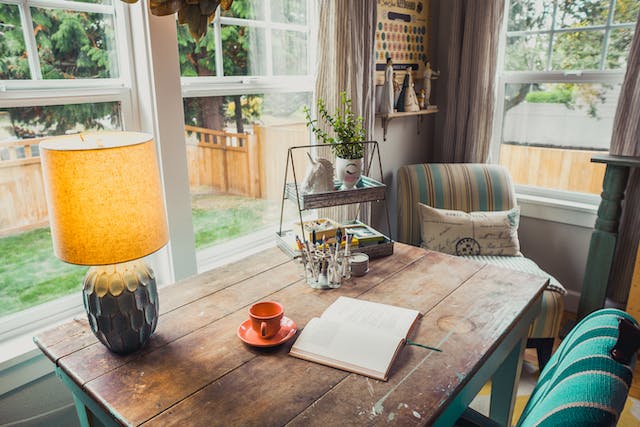
Transforming Your Balcony or Rooftop

Transforming Your Balcony or Rooftop with Urban Gardening

There is an untapped potential for creating green havens of serenity and beauty on balconies and rooftops. As cities continue to grow and space becomes scarcer, transforming small, overlooked spaces with urban gardening has gained momentum. Transforming your balcony or rooftop with urban gardening offers many benefits, from providing a source of fresh produce and herbs to creating relaxing retreats and improving air quality. Luckily, the possibilities for creating a lush, green oasis amid urban chaos are within your reach.

Assessing Your Space

Start by measuring your space. Is it cozy or spacious? Consider how you want to use it – for dining, relaxing, or growing your garden. Visualize the layout to make the most of every inch. Also, pay close attention to the sun’s path. Is your space a sun-soaked spot or a shaded nook? Different plants thrive in different light conditions, so understanding your space’s microclimates will help you pick the perfect green companions.

Ensure your balcony or rooftop can support the weight of your garden. Check for sturdy railings, and consult with a professional if needed. We want your urban garden to be a safe and enjoyable retreat. Remember, assessing your space sets the foundation for a flourishing urban garden. Therefore, grab your measuring tape, study the sunlight patterns, and ensure safety.

Start Planning Your Space

Firstly, think about what you want from your garden. Are you aiming for a lush green oasis or a practical herb garden? Setting clear goals will help you stay focused and satisfied with the results. So, grab a piece of paper and sketch your vision. Where will your plants go? Where’s the seating area?

In addition, picking a color scheme or theme will give it a harmonious and inviting feel. At the same time, remember that different plants have different growing seasons. Plan your planting schedule to ensure a continuous display of beauty throughout the year. Planning is the key to a successful urban garden. So, dream big, sketch it out, pick your colors, and time it right – your urban oasis is about to come to life!

Start with easy-care plants that won’t take too much time.

Selecting the Right Plants

Find your local climate zone to pick plants that can handle the weather. Not all plants are pot-friendly. Go for container-savvy varieties, ensuring they’ll flourish in the limited space of your balcony or rooftop. Ask yourself – are you after fresh herbs and veggies or simply looking to add beauty? Decide whether you want to satisfy your taste buds or soothe your soul.

If you’re new to gardening, start with easy-care plants that won’t require too much time. In addition, don’t let a lack of space stop you. Embrace vertical gardening using wall-mounted planters and shelves to maximize your garden’s potential, turning your space into a lush, green haven. Your plant choices define your urban garden’s personality, so pick wisely, and soon, your balcony or rooftop will be bursting with life and color.

Furniture and Decor

Now, let’s talk about furniture and decor, which turn your urban garden into a cozy oasis that reflects your personality. Your outdoor space deserves a seating arrangement that’s as comfortable as chic. Choose furniture that suits your needs, whether a cozy lounge chair, a bistro set for two, or a spacious dining table. At the same time, make it an extension of your indoor style. These are the details that add character and charm to your garden. Mix and match different-sized pots, experiment with unique planters, and hang baskets to create levels of greenery.

On top of that, take the theme up a notch with decorative elements like outdoor art pieces. Let your imagination run wild, making your space truly one-of-a-kind. Extend your outdoor enjoyment into the evening by adding lighting. String lights, lanterns, or solar-powered fixtures provide functionality and create a warm, inviting atmosphere.

Carefully consider how much sunlight your apartment or rooftop gets before you purchase plants.

Moving Your Urban Garden to a New Urban Home

Just like packing up for a trip, ensure your plants are ready. Prune them if needed, secure them in sturdy containers, and ensure they’re well-watered before departure. Treat your green buddies with care during the move. If you want to ensure you are moving your plants safely and securely, avoid direct sunlight and strong winds and cushion them with padding to prevent damage. Once at your new place, give them time to acclimate to their new surroundings before replanting them.

Each urban spot has unique quirks, so be patient as your plants adapt to their new environment. Monitor sunlight, temperature, and humidity levels and make any necessary adjustments to ensure they thrive. With a little extra attention and care, they’ll settle into their new home and continue to flourish.

Maintenance and Care

Just as you need nourishment, your plants crave it too. Therefore, develop a watering schedule tailored to your plant’s needs when transforming your balcony or rooftop with urban gardening. Don’t forget to feed them with the right fertilizers to keep them lush. Furthermore, regularly prune to encourage healthy growth and keep an eye out for pesky insects. Swift action can prevent infestations from taking over.

Seasons change, and so do your plants’ needs. So, be attentive to shifts in weather and adjust your care routine accordingly. Consider rotating plants to different spots to ensure they all get their fair share of sunlight and attention. Like reducing, reusing, and recycling in your daily life, embrace sustainable practices. Collect rainwater for irrigation, compost kitchen scraps, and choose eco-friendly pest control methods to minimize your environmental footprint.
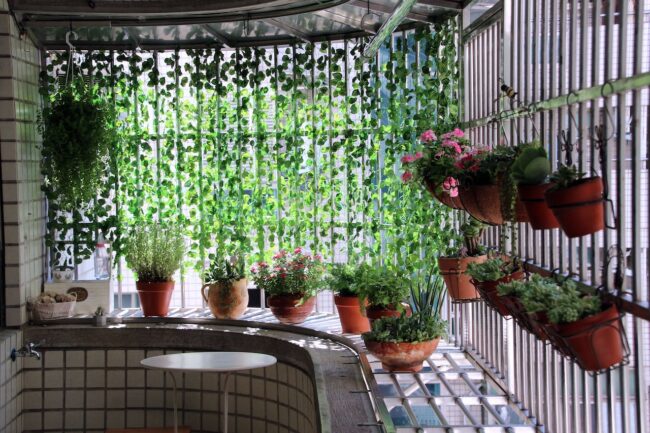
Choose the right plants for your area when transforming your balcony or rooftop with urban gardening.

Final Thoughts on Transforming Your Balcony or Rooftop with Urban Gardening

In the ever-expanding world of urban living, transforming your balcony or rooftop with urban gardening is a project worth trying. Now, you can create an urban garden that brings beauty and fosters a sense of belonging to the green world around you. Remember, you can create a garden space to reflect your personality and introduce a functional feature in your home.

Meta Description:

Transforming your balcony or rooftop with urban gardening can be fun! Learn how to pick plants, care for them, and create a green oasis.

Kw:

Transforming Your Balcony or Rooftop with Urban Gardening


A Longfellow Goodbye

Castle Building & Remodeling is closing our Longfellow Showroom at 4020 Minnehaha Ave S, Minneapolis, MN 55406 effective February 28th, 2024 when our lease term expires.  ‘Castle made this decision after analyzing the space and realizing it no longer fit our needs as a design/build firm.  We are thankful to have three other showroom locations in short proximity to Longfellow, which will allow us to continue to serve our customers for years to come.

Castle is committed to serving the Longfellow neighborhood and all of South Minneapolis and will continue to have a presence in the neighborhood with our World Headquarters and operations hub remaining at 2710 E. 33rd St., Minneapolis, MN 55406.  We look forward to continuing to participate, give back, and be a part of this vibrant community.  Our designers will be available to meet with clients at any of our other three nearby Minneapolis and St. Paul showrooms.


7 Ways Winter Weather Can Wreak Havoc

7 Ways Winter Weather Can Wreak Havoc on Your Home

Winter is a beautiful season with enchanting snowfall and crisp, cool air. However, it can also be fierce and unforgiving, bringing below-zero temperatures and strong winds that can cause severe damage to your home. Left unchecked, you could be dealing with some expensive repairs come springtime, so it’s important to know what kinds of issues to anticipate and how to prepare adequately. From the roof to the foundation, here are seven ways winter can wreak havoc on your home.

1.  Chimney Cracks

Your chimney’s masonry can withstand extreme heat conditions, but not so much the freezing cold. When the bricks absorb water, the moisture inside freezes, causing the masonry to expand. The ice then thaws when the sun comes out and causes the masonry to contract. This continuous loop of expansion and contraction can quickly lead to spalling and delamination — or cracks in the concrete in lay terms.


Over time, the crumbling masonry can make the chimney structure unstable, increasing the risk of a full-on collapse. You might spend anything from a few hundred to thousands of dollars to fix a cracked chimney.


2.  Roof Damage

Strong winds, heavy snowfall and accumulating ice are a destructive combo for your home’s roofing. Powerful gusts can pry up roof shingles or even blow them right off.

Large amounts of wet snow and ice build-ups can put significant pressure on your roof, causing it to sag. Usually, anything over 20 pounds per cubic foot of snow on your roofing is problematic, leading to possible cave-ins. The risk exponentially rises with older buildings or homes whose roofing structures have seen better days.

3.  Gutter Ice Dams and Icicles

Gutters are crucial in safely channeling water and snowmelt away from your roof. However, if they’re clogged or otherwise damaged by the time winter arrives, it won’t be long before ice dams and icicles start to form.

Ice dams occur when heavy snow buildup melts and refreezes in the gutters and along the roof eaves. Eventually, icicles form, adding to the pressure on the troughs.

Damage from ice dams and icicles can be costly to fix because they prevent proper drainage, causing water to seep under your roofing shingles or trickle down the walls, and pool on the ground. Sometimes, the pressure from the ice buildup can pull down the gutter and downspout, exposing your roof to water damage.

4.  Siding Issues

Your home’s siding may be susceptible to the same freeze-thaw cycle that affects your chimney’s masonry. When the siding material absorbs moisture, cold conditions cause it to expand, while warm weather causes it to contract. As the cycle happens over and over, the material can eventually crack, resulting in serious structural damage to the siding.

Additionally, siding materials like wood do not hold up well to cold weather and can quickly warp or even rot, leading to substantial damage. Heavy winter storms can loosen the siding for homes with vinyl siding, exposing the insulation and leading to a freezing cold home interior.

5.  Door and Window Damage

Freezing temperatures can cause your door and window frame materials to warp. Drafts can seep through the gaps caused by the warping, effectively ruining your home’s insulation. In some cases, the damage can become so extensive that you might need to replace the entire frame in the spring season.

Extreme cold can also cause the door and window glass to become brittle, making it easier to crack or shatter. However, you can take some solace in knowing that this issue mainly affects older, single-pane glass and improperly installed doors and windows.

6.  Plumbing System Problems

Winter conditions can spell all sorts of problems for your home’s plumbing system. Exposed or uninsulated pipes are vulnerable to freezing. Frozen water can burst the pipes, leading to bigger plumbing issues. If the line leading to the water heater is frozen, it becomes difficult for water to get into the system. Over time, this can lead to water heater failure.

Clogged drains and septic line failure are other potential problems from frozen pipes. When freezing occurs in the main line connecting the septic tank, your home’s drainage system can get backed up. Sewage leaks can occur, creating even more damage.

7.  Basement Flooding and Foundation Issues

Heavy snowfall accumulated on the ground will eventually melt and pool on the floor. If your home does not have a way to deal with the runoff, the water will seep into the ground and flood your basement.

Cold temperatures can also cause frost heave — a potentially dangerous situation caused by ice formations in the soil. When this occurs, the ice creates pressure against your home’s foundation and can cause it to shift. As a result, you may start to notice foundation damage, including cracks in the walls and uneven flooring.

Handy Tips to Prep Your Home For Winter Weather

Proactive maintenance goes a long way in helping you prepare your home for the destructive power of winter. Follow these helpful tips to stay ahead:

  • Inspect your roof. A roofing inspection before winter can reveal vulnerabilities early before they lead to more extensive damage down the line. Remember to include your chimney in the inspection list.
  • Install an ice and water shield. This shield can effectively stave off ice buildups in your gutter. However, check that your contractor is using enough — many misinterpret the 24-inch rule and only install one row where two might be necessary.
  • Recaulk doors and windows. Recaulking improves sealing, helping to prevent cold air drafts from seeping into your home. In this way, it also helps improve your heating system’s efficiency, lowering energy costs.
  • Remove nearby tree branches. Leaves, twigs and other debris are the leading causes of gutter blockage. Cut any branches close to your roof to reduce the risks of clogging when the cold winds start to blow.
  • Drain exterior faucets. This is to prevent undrained water in the pipes from freezing. Disconnect all external hoses and turn off the water supply to avoid a frozen buildup.
  • Divert water away from your property. Add extensions to your downspouts so water drainage is at least three to four feet away from your home’s foundation. Put some rocks or gravel at the end of the extension to help avoid soil erosion.

Is Your Home Ready for Winter?

Extreme cold weather conditions can wreak havoc on your home. Now’s the time to make sure your property is ready. Taking proactive steps helps you avoid costly repairs and provides peace of mind, knowing your home can withstand the challenges of winter.

Why Winter is the Best Time of Year

Why Winter is the Best Time of Year for Home Renovations

While most people prefer to do home renovations during summer, they might miss out on many wondrous benefits of rolling out a remodeling plan during winter.


Don’t wait for the summer months to upgrade your home. Discover what makes winter the best time of the year to start your home renovations, as well as winter-approved home improvement projects to inspire you.

Faster Approval of Permits

Winter months are less busy than usual, meaning municipal services are generally more amenable to accepting new requests. Compared to summer, when getting a building permit takes longer, approvals during winter may only take a few days.


This would also mean fewer risks of starting the project later due to delayed issuance or permits. It allows you to upgrade your home with fewer worries about last–minute issues.

Contractor Availability

Contractors commonly experience a slump during the holiday season after working on several projects throughout the summer. The good news for potential clients like you is that you take advantage of this opportunity. Since contractors are more available and have fewer projects, they can better focus on your renovation project.


Given this, the tasks are more likely to push through and end in a timely manner. The contractor can even hire more workers to increase the project’s progress.

Cheaper Labor

Have you tried getting a quote for a summer renovation project? Contact a contractor and ask for a quote this winter — you’ll see a significant price difference. Since remodeling plans are fewer during the cold season, contractors sometimes lower their fees to attract new clients and keep their workers busy. These lower prices apply to both construction materials and labor.


There’s no perfect time than colder months to take advantage of reduced rates, especially when operating only on a specific budget. This is why winter is considered the most underrated season to launch a renovation plan. There’s a significant reduction in demand and rates, making it the perfect time to grab the opportunity.

Enjoy Summer to the Fullest

Many people opt to roll out renovation plans during summer to avoid dust accumulation, which is believed to be more challenging to deal with during winter. However, contractors have special equipment to keep the dust produced during work at bay, regardless of whether work happens during the colder months or summer.


Additionally, launching a remodeling project during winter means you can enjoy summer to the fullest. Since the warm season lasts only a few months, it would be more fun to spend it on the beach than in your home that’s under construction.

7 Winter-Appropriate Renovating Projects

Without planned trips and fewer outdoor activities, you can successfully roll out these remodeling plans when stuck inside your home this winter:

1.   Fix a Leaky Roof

Roof leaks during the holiday season are common and can dampen your festive cheer. Here are some problems a leaky roof can cause:


  • Ice dams: If you notice melting snow leaking into your home, you may have an ice dam collecting on rooftops.
  • Compromised flashing: This is a thin material to guide water away from penetrating inside your home. Melting snow can leak through cracks when damaged.
  • Attic condensation: Poor insulation can result in moist air entering your home. Since the temperature is cooler in the attic than in other areas at home, moisture can quickly turn to condensation.


Prevention is key for a leaky roof. Hire a contractor to do a roof inspection. If you notice bulging in your ceiling, chances are there’s water pressure building up caused by the snow’s weight. Raise your concern to your contractor immediately to prevent bursting and flooding in your home before it’s too late.

2.   Install Hardwood Flooring

The holiday season calls for hardwood flooring to add warmth and texture to your home. They’re also easier to clean than carpet and have better insulating properties than worn flooring. The colder air helps lessen the adhesive’s drying time during installation.

3.   Update Light Fixtures

The holiday season can bring various physical changes to people, such as dry skin and chapped lips. The lack of sunlight and longer nights can also dampen your mood.


If your interior lights affect your productivity and focus, consider replacing your old lights with bright, cheery options to improve illumination. That way, you can enjoy the holidays with positivity.

4.   Replace Kitchen Countertops

Winter months call for more indoor gatherings. If you want to brighten your kitchen, consider upgrading the countertops. The average cost of remodeling a kitchen sits between roughly $14,000 and $40,000, with several factors affecting the estimate, such as project scale and kitchen size.


When choosing a design for your kitchen countertops, consider your preferences and how you envision your dream kitchen. Think long-term in terms of design and material. When on a budget, opt for laminated countertops since they are more affordable than other selections.

5.   Clean and Upgrade the Laundry Room

While crucial in your day-to-day functioning, the laundry room gets little to no attention when thinking about remodeling. Spend a weekend during the winter to clean the room and think about how to make the space more functional for everyone. Give it a thorough cleaning, upgrade the organizers or replace your washing machine with a new one.

6.   Renovate the Attic


Your attic is one of your home’s primary rooms. Insulating this room is one way to ensure your house and family stay warm inside. A well-insulated home means more comfortable nights and lower utility bills. When renovating the attic, you might discover that you must seal up window and door cracks with an insulating spray foam.


7.   Repaint the Walls


Maximize your and your family’s time indoors with an easy remodeling project. The winter atmosphere creates an ideal condition for paint to set in quickly during the more humid months. Even better, this can soon become a bonding moment, which can help alleviate feelings of loneliness brought on by the cold weather.

‘Tis the Season to Renovate Your Home

You can accomplish many advantages and remodeling projects, even if the weather is colder and nights are longer. With this information and remodeling ideas, you can successfully roll out a renovation project with your trusted contractor this holiday season.


Create a Functional Home Office

How to Create a Functional Home Office in a Small Space


Creating a functional home office in a small space is not just a desire; it’s a necessity for many. With the shift towards remote work, the challenge of fitting a productive workspace into limited quarters is real. This article addresses this challenge head-on. Here, you can find practical tips for quick renovation projects that will transform even the smallest nook into an efficient home office. A goal is to help you maximize your space, guaranteeing comfort and productivity, regardless of its size.

Assessing Your Space to Create a Functional Home Office

The first step in creating a functional home office in a small space is a detailed evaluation of the available area. Accurate measurement is key to understanding the dimensions you have to work with. When measuring, consider the floor space, height, and potential storage areas on walls. Visualize how different furniture layouts might work using online tools or simple graph paper. The right spot for your home office should balance quietness for concentration and accessibility for ease of use.


Finding the ideal location for your home office should strike a balance between accessibility for ease of use and peacefulness for focus.


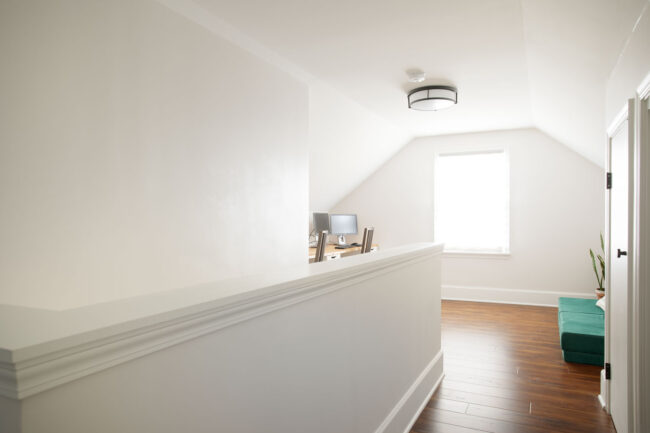
In your home, unconventional spaces can often hold untapped potential. For instance, the potential of your new home’s top floor might be perfect. This space can offer seclusion away from daily household noise and distractions. Also, consider the natural light available here and the feasibility of setting up electrical points for your equipment. This approach makes efficient use of your living space and adds a new dimension to your work-from-home experience.

Choosing Space-Saving Furniture

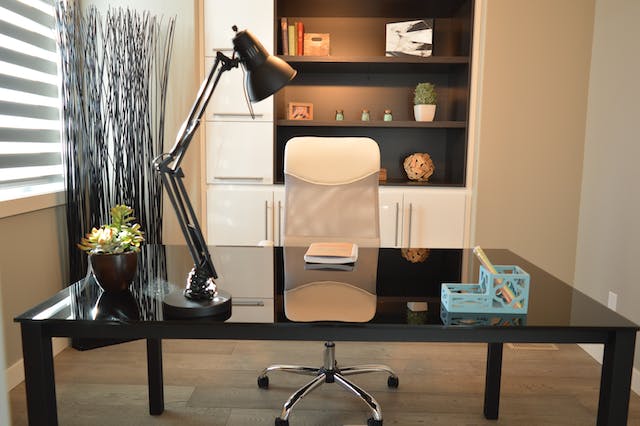
Selecting the right furniture is vital to maximize space utility in a small home office. Compact desks are a must; look for options that fit snugly into your designated area. Check for desks with built-in drawers or shelves, as they can reduce the need for additional storage units. For chairs, prioritize ergonomics and a small footprint. Comfort is key, as you’ll spend a lot of time sitting.

Multi-functional furniture is a game-changer in small spaces. Think of a desk that doubles as a bookshelf or a fold-out table that can be tucked away when not in use. These furniture pieces save space and offer the flexibility to adapt your home office according to your needs.

Smart Storage Solutions

Storage is a critical component of a small home office. So, if you want to make the most of your space, look upwards. Vertical storage solutions, like floating shelves or tall, narrow cabinets, can be a great way to use wall space effectively. This approach frees up floor space, making your office feel less cramped. Organize items by frequency of use, keeping the most needed items within easy reach.

When considering storage, sometimes items can be stored outside the home office. If you’re thinking about renting a storage unit, there are several things to keep in mind. Security, cost, and accessibility are important factors. This option can be particularly useful for items you don’t use regularly, helping keep your immediate work environment clear and focused.

Lighting and Ergonomics

Lighting plays a vital role in creating a productive workspace. Position your desk to maximize the use of natural light, which can enhance your mood and energy. In situations where natural light is limited, invest in quality artificial lighting options that mimic daylight and reduce eye strain. Desk lamps with adjustable arms are particularly useful as they can be repositioned as needed.

Setting your desk in the best possible position to take advantage of natural light can improve your energy and attitude.


Ergonomics is equally important, especially in constrained spaces. Choose a chair with good lumbar support and adjust your screen to eye level to avoid strain. Small ergonomic accessories like keyboard trays or monitor stands can make a significant difference. Remember, comfort in your workspace can directly influence productivity and health.

Personalizing Your Space

Personalizing your home office is about striking a balance. You want to create a space that reflects your personality and maintains a professional feel. Choose a few key items that inspire you, like artwork, photos, or plants. These items should add to the space without creating clutter. The goal is to create a space that motivates you to work.


Establish a space that captures your individuality while still feeling professional.


Consider the functionality of each decorative item you add. Use stylish yet practical items like decorative storage boxes or unique pen holders. These pieces can add personality to your space while keeping it organized and functional. This approach helps maintain a balance between a personalized and a professional workspace.

Tech Setup for Small Spaces

In small home offices, choosing the right technology is crucial. Opt for compact, space-saving devices like laptops or all-in-one computers. These devices take up less room and can be easily moved if you need to reconfigure your space. Pay attention to the tech specifications to ensure they meet your work requirements.

Effective cable management is essential to maintain a tidy and safe environment in a small space. Use cord organizers, clips, or ties to keep cables neatly bundled and out of the way. A strong, reliable internet connection is also crucial. Consider the placement of your router and use Wi-Fi extenders if necessary to ensure consistent connectivity.

Maintaining a Productive Atmosphere

In a small home office, minimizing distractions is key. Set clear boundaries for your work area to separate it from the rest of your home. This separation helps in maintaining a work-life balance, which is crucial in small spaces. Use techniques like noise-cancelling headphones or room dividers to create a distinct work environment.

To maintain a productive atmosphere, be aware of common renovation mistakes to avoid. Overcrowding your space with furniture or decorative items can make it feel cramped and hinder productivity. Instead, aim for a minimalist setup that focuses on functionality. Regularly declutter and organize your space to keep it conducive to work.

Final Words

Establishing a functional home office in a small space can be straightforward and effective. From carefully assessing your space, choosing the right furniture, implementing smart storage, and maintaining an organized environment, you can create a practical and enjoyable workspace. These tips aim to help you efficiently use your available space, ensuring your small home office is a comfortable and productive area for your work needs.