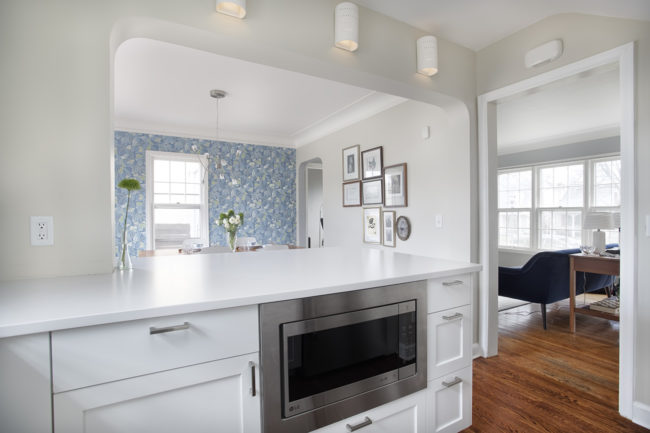
Picking a style and look for your cabinets can be a daunting task. But never fear, we are here to help you every step of the way. There are a lot of things that people simply don’t know about cabinets until they get them in their house and only then do they see the difference in construction, function and style.

We are confident that our quality exceeds that of the majority of cabinet shops in this country, and abroad. We take great pride in our work and hope to get the opportunity to serve you and your cabinet needs.
What is the difference between a custom built cabinet box and an imported cabinet box?
Glad you asked. The imported boxes we offer are made in China and shipped to the United States. These boxes are usually our more affordable option and are faster to put together. The materials are sturdy enough to handle most use cases but won’t last as long as a custom built box.
Our custom built boxes are made using our top of the line equipment to ensure that all sizes and measurements are accurate and consistent. We measure down to the 1/16th of an inch. We carefully construct our custom built boxes to last a lifetime, in fact: we guarantee these boxes for your lifetime. We glue and nail or staple every joint to ensure it’s as strong as possible.
If you’re not sure which style you need, imported or custom built consider these questions:
- What is your budget for cabinets?
- How long do you plan to live in your home?
- How many people will use these cabinets?
- What environment will these cabinets be in (garage, kitchen, bathroom etc.)?
We’ll be happy to discuss your options with you and make sure you get the best solutions for your unique needs.
What is the difference between Face Frame and Frameless cabinets?

Another excellent question! Our face frame cabinet has a solid 3/4″ thick wood frame on the front of the box and is constructed in a manner that allows us to use all of the modern European hardware with full overlay doors and drawers (very little cabinet exposed behind the doors and drawers).
We also offer a frameless cabinet. This cabinet is the most common in our industry, having only a thin layer of PVC on the front of the cabinet instead of solid wood. While it is not as sturdy as a face frame cabinet, we have engineered a production process including the blind dado that allows us to build a very sturdy and vastly superior cabinet compared to the most typical butt joint construction used by the majority of our industry.
Both cabinet styles are full overlay, using lifetime guaranteed hinges and drawer guides. Our standard hinge comes with the soft close feature and two of the three options of drawers we build also come with the soft closes feature.
Understanding Your Cabinets
The first step to maintaining your cabinets is to understand their quality and durability. The level of cabinet quality, as in all products, can vary substantially. Good quality cabinets should be regarded as high-end furniture pieces that are installed in “hard-use” rooms. Therefore, they require the same type of care you would give high-end furniture.
When properly cared for, quality cabinets will retain their beauty and function for many years. Today’s cabinets may not only be constructed of solid wood and wood veneers but may also contain a variety of quality engineered products that are durable, attractive, conserve wood and meet all safety and health requirements. Some frequently used surface materials are:
- Melamine (Formica-like) – commonly used for countertops but may also be used for other surfaces.
- Vinyl – may be wood grained or solid colors. May be used for all surfaces except countertops.
- Paper – chemically and finish-treated for durability. May be wood grained or solid colors and used for all surfaces except countertops.
Commonly used panel core materials are: MDF, lumber, wood veneers, flake or particleboard and hardboard.
Preparing for Future Maintenance or Repair
Quality products can be damaged or in time need repair, so when you purchase your cabinets obtain the following items from your cabinet supplier and store them in a permanent location:
- Several hinges
- Two or three drawer guidance systems
- Several pulls
- A repair kit, if available from the manufacturer
- A small (pint-size) amount of each stain or color coat used for finishing your cabinets (clear top coats are available in aerosol cans from your local store)
- The name and address of the cabinet manufacturer and the name of the cabinet style (you may want to add cabinets or replace a damaged part at some future date).
Some Recommended “Do’s & Don’ts”
- Don’t hang wet towels on door or drawer fronts.
- Don’t permit children to swing on doors or use drawers as step ladders. Hinges or drawer guidance systems that are bent or twisted likely cannot be repaired like new.
- Spills should be cleaned promptly. Most finished surfaces are highly resistant to household foods and liquids; however, prompt cleaning will add assurance.
- If at some future date you want to paint or refinish your cabinets, be cautious. Many paints are not compatible with cabinet finishes. Severe surface peeling or blistering of the paint could result.
Repair Tips
- There are many adhesives available to repair broken wood parts or loose panel surfaces. If properly used, Elmer’s Glue (or equivalent) or a contact adhesive can manage most repairs..
- For small loose areas of wood veneer on edges of doors, etc., or at the edge or corner of panels:
– Carefully clean all old, dry glue from loose surfaces with a
scraper or sandpaper.
– Apply a thin, uniform coat of Elmer’s-type glue to one surface.
Press the loose veneer into place and wipe off the excess glue
squeezed out. Using a strong tape as a clamp, tape the loose
veneer down as tightly as is practical and allow 24 hours for
drying before removing the tape. - For split or broken wood part:
– Proceed similarly to repairing wood veneer.
– For split wood, work glue into the split as deeply as possible,
push tightly together, wipe off squeezed-out glue and clamp as
tightly as possible with strong tape for 24 hours. If the damaged
location will permit the use of a metal screw or other type
clamp, you might rent such clamps at the Rent-All location and
get more positive clamping action. If removable, such as a
drawer, clamping in a vice until dry would be excellent.
– For a small wood section that is bumped and split completely
loose, apply glue to the loose part and carefully tape it to its
original position until dry. - For small, loose areas of man-made material surfaces or veneers on edges or panel corners:
– Clean as in 2 above
– Apply contact adhesive according to instructions on the
container and place the loose section firmly in place - For a stripped screw as at a door hinge:
– Remove the screw and clean dust or chips from the hole. Cut
wood match sticks to the approximate hole depth. Apply glue to
the match sticks and in the hole. Lightly hammer the
matchsticks into the hole, filling the hole tightly. Allow to dry
for 24 hours. After drying, trim the match sticks flush to the
surface. Carefully re-drill the screw hole using a drill bit
approximately the root diameter (screw base diameter not
counting threads) of the screw. The same screw may then be
applied, however, a sheet metal screw (local hardware) of the
same size will provide better holding power, particularly for
repair purposes. - Should a machine screw (or bolt) holding a door or drawer pull no longer hold (stripped threads), place a small amount of steel wool around the threads and screw carefully into place without heavy pressure. It may hold.
- Generally – never use nails for repair. They often split or shatter the wood or particleboard core causing more damage.
- Never drive a screw into any part or wall without first pre-drilling to the root diameter of the screw.
- Cabinets or heavy objects screwed to wall panels will not hold satisfactorily. They must be screwed properly to structural studs.
- Should a pull become broken, or a hinge or drawer guidance system break or not operate properly, replace them from your permanent storage.
Finish Repair
CAUTION – ALL FINISHING MATERIALS MAY BE HIGHLY FLAMMABLE!
Proper finish repair can be rather highly skilled procedure, particularly since several types of finishing materials including man-made materials, may have been used on your cabinets. However, there are four possible sources of correct repair material:
- A repair kit from your cabinet manufacturer or supplier.
- Small cans of color coats from your supplier.
- Felt tipped pens or finish and/or putty sticks in a wide variety of colors from your hardware or home supply store.
- Aerosol cans of clear, final top coat spray can be purchased at your hardware or home supply store.
Sprayed-on type standard finishes, which are scratched or lightly dented, can be repaired with these materials. For the inexperienced, practice on a small board or 2×4. Colored putty sticks fill dents with a putty knife. Apply color coats of finish lightly since you can apply more coats to darken to match. Once too dark, colors cannot be easily lightened. Protective top coats are sprayed on last – use according to aerosol can instructions. Practice first, – you may have to “mask” other surfaces to avoid overspray. Be cautious – the sheen or brightness of the topcoat material, when thoroughly dry, may not match your cabinet.
